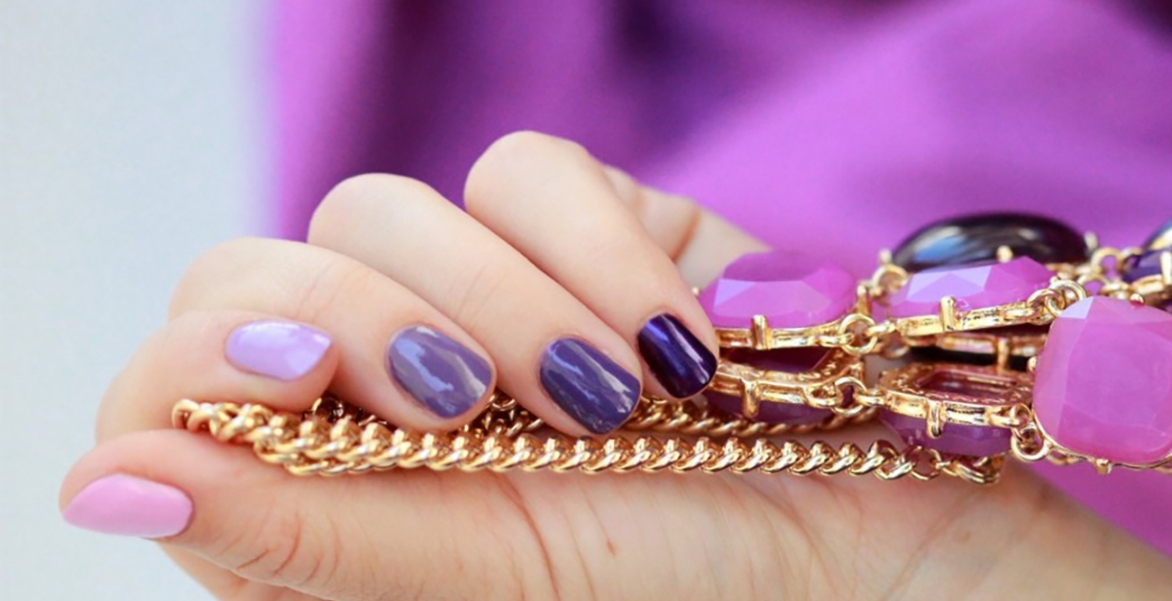
“I am different when my nails art is done! I am more dynamic!
I gesticulate more, I am better at scaring my staff. I can indicate impatience by drumming on tabletops and I can wrap up a meeting with a few choice clatters.”
― Marian Keyes
Every time I blog or cover any assignment (which is almost all the time because I’m such a grave workaholic) I put both my hands on the keyboard;
And my insides ring a bell! My brain starts to panic, I’m thinking;
“If I don’t do my nails right now, I won’t be able to work and even if I work, it’s going to stink. Because your work reflects your nails! And nails are bae!”
So I carefully put my laptop aside and beautify myself!
Moral of the story, BEAUTY COMES FIRST!
Offices will come and go (ironically, my nails are no less. They too come and go!) BUT whether you have disturbingly bit-short nails or Kardashians inch long ones, don’t give them a dry, non-colourful life!
YOU GOTTA GLAM THESE BABIES UP!
Ombre DIY Nail Art Hack That is Borderline Genius (With Pictures)

There are billions of blogs out there, ready to enlighten you with innumerable nail art designs.
But!
Believe me, most of them will have you wonder if; DIY means do it yourself or discover it yourself!
They just won’t give you the necessary details, expecting you to join the dots and fix the puzzle!
Pampering your nails is not as easy as it seems. It may look like you have it all under control, but trust me you don’t!
It’s like changing your babies’ diapers! The fathers may think it’s as easy as keeping smelly trash outside the house but only the mothers know the “rash problems”
Keeping this baggage in mind, this article focuses on a single Nail Art design that will have your mind-blown!
The Ombre nail is a simple and elegant way to run through the summers!
This design works everywhere!
Whether you have a wedding to attend or a summer beach party; ombre compliments anything and everything!
What You’ll Need:
-
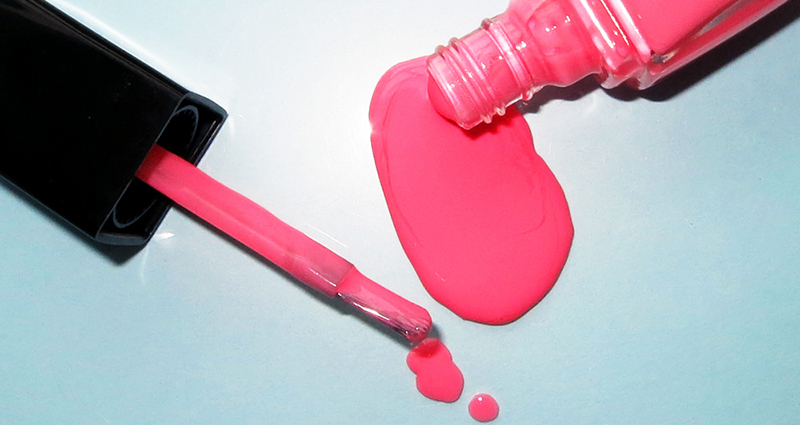
- Two color polishes and a topcoat: You can choose colors that compliment or go bold and pick two that clash. Experiment with different combinations and see what works!
-
- A sponge, a plastic sheet and toothpicks: You can use absolutely any sponge – a makeup sponge, washing up sponge or any other kind of sponge that you can find.
If you don’t have any of these plastic wallets in the house, raid the kitchen cupboards for some foil or baking paper.
Step 1
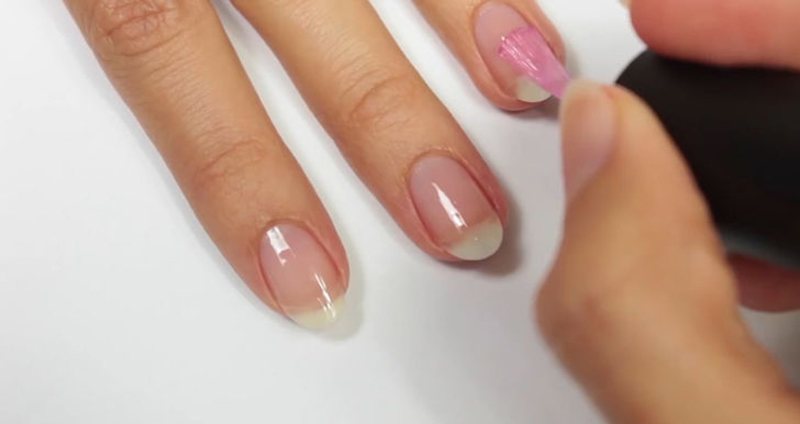
Using the lighter of the two colors, paint your nails and wait for it to dry completely.
Step 2
On a flat surface, paint a generous amount of the colors right next to each other on to the plastic. Make sure they’re just about touching the edges.
Step 3
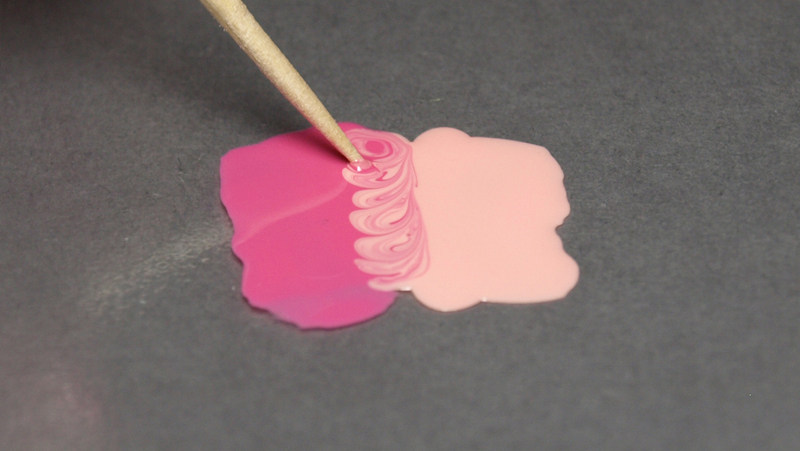
Using a toothpick, swirl the two colors together to where they meet. The area where they mix will determine the length of the graduation. So, if you want a long graduation, mix a bigger section of the colors; if you want less of a fade, just mix them together a tad bit.
Step 4
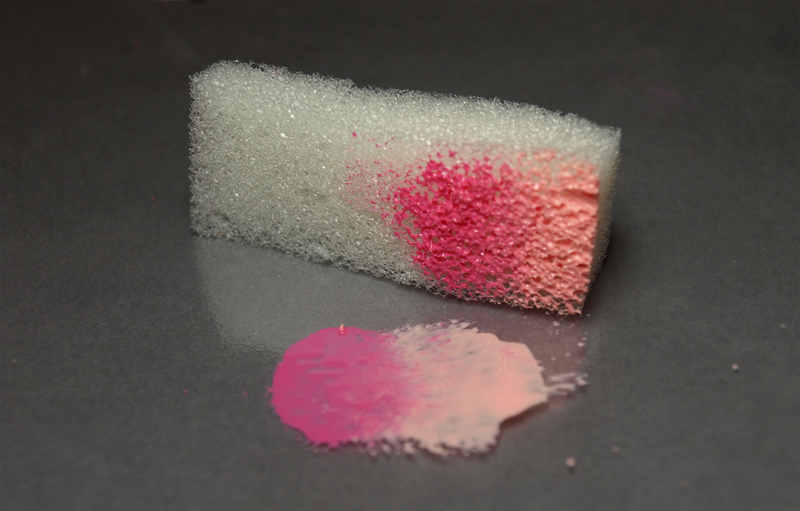
Take your sponge and dab it directly down on to the polish a few times.
Step 5
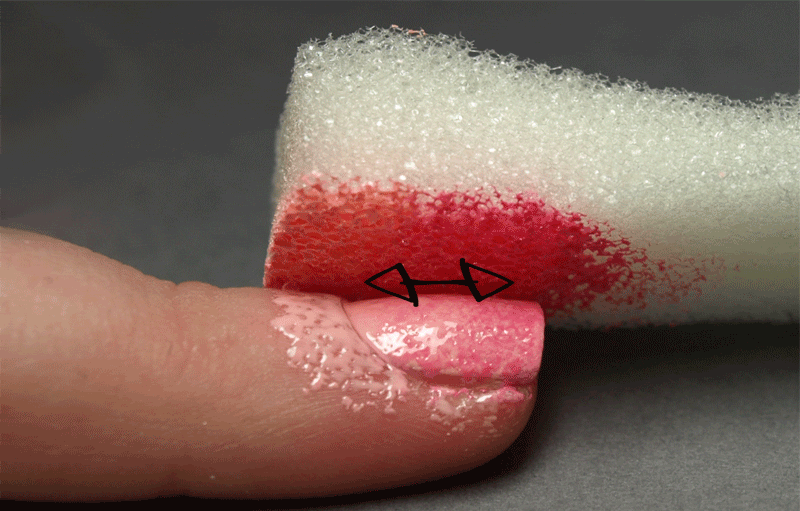
Dab the sponge directly on to your nail. Keep dabbing lightly and moving it very slightly up and down your nail.
-
- Glam Tip: You can repeat this step as many times as you need to. Just make sure each layer is completely dry before sponging again otherwise, you will start smudging the bottom layers and ruin the whole thing!
And that’s the worse of all feelings!
P.S: If you think you have OCD, don’t try this at home, or at all for that matter.
Step 6
Add a topcoat. Or two or three! The sponging makes this manicure very bumpy so you may need a couple of topcoats just to even out the surface!
Top coats let you enjoy the art work for a wee bit longer!
I’m sure you don’t want to watch hours of work being destroyed in just 2 days! Now do you?
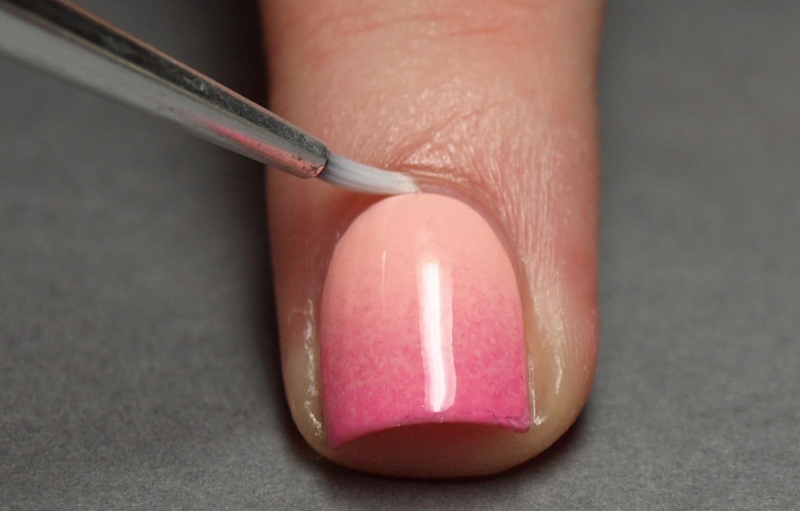
Step 7
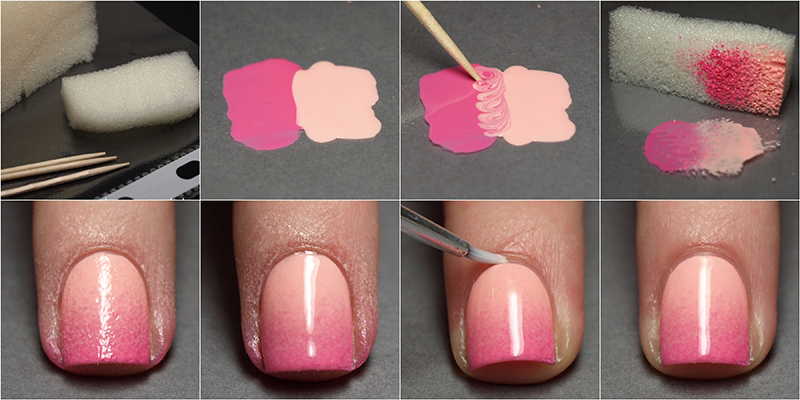
Clean up all the excess paint by using a brush dipped in acetone or polish remover. I use a Q-tip dipped in remover for the big bits on my skin then a small brush in pure acetone as I get closer to my nail to make a crisp line near the cuticles. (source)
Own up to woman-hood and burn your ex boyfriends current affair with the class from your toes to your nails!