Organizing can sometimes make the strongest of women feel weak in the knees, especially if she has a toddler running around in the house, exactly like in my case. But as they say, where there is a will, there is always a way!
So here are some brilliant DIY organization ideas which help declutter the house in no time, making it look presentable all day, every day.
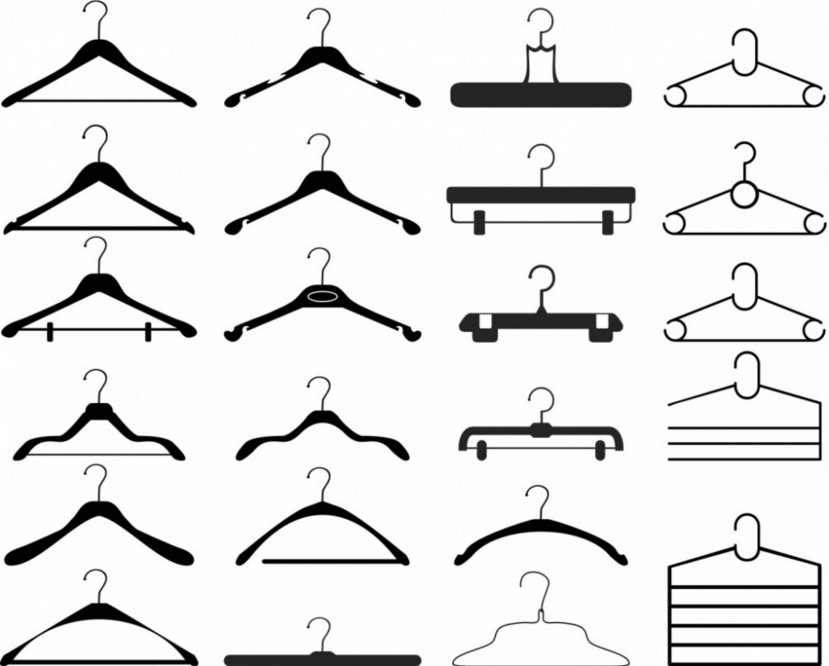
To begin with, you will need quite a few hangers of different sorts, to fit all of your requirements.
These are the sort of hangers that are readily available in the market:
Let’s begin with the most useful and surely my favorite DIY organization idea:
1. Flip flop organizer:

If you are a flip flop lover, you are sure to have a drawer full of flip flops, lying jam packed, one on top of the other. But not anymore!
This organizer helps in keeping the shoes in sight, making it easier for you to use, along with keeping the mess at bay.
Here’s what you will need:
-
- – A wire hanger
-
- – A pair of pliers
-
- – A can of spray paint
-
- HOW?
-
- Cut the wire hanger from the middle, with the help of pliers.
-
- Turn both ends upward, making a deep ridge in the middle, where the slipper would sit.
-
- Turn the pointed ends of the hanger, inwards to avoid any injury.
-
- Lastly, coat it with a color of your choice with the help of a spray can.
-
- Once dried, it is ready to use.
To notch up your organizing game, you could also color code the hangers according to the color of your flip flops.
2. Jewel exhibitor
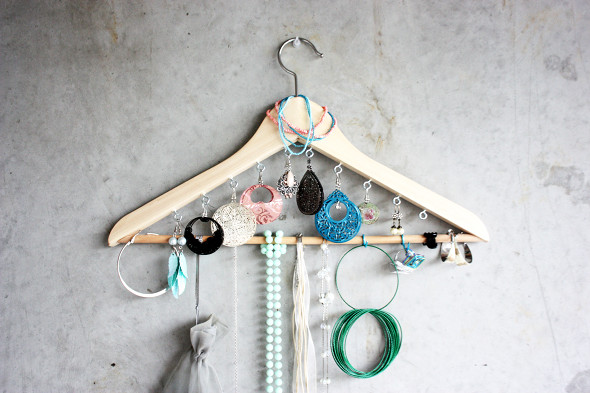
Jewels are women’s best friends but when it comes to organizing them, they can turn into the most volatile of enemies. But with this brilliant DIY organization idea, we saw the tables turning around speedily!
This exhibitor will help save up your time, when getting ready, making each piece easily reachable.
You will need to get:
HOW?
-
- With the help of a hammer, fit in the looped screw at measured spaces on the inner side of the hanger.
-
- When fastening the hooks on the outer rod by passing a wire through the holes and coiling to the sides, will help secure it in place.
That’s about it. Use the top hanging, to put earrings while the hooks for hanging rings and neck pieces.
*No more shuffling through the jewel drawer in search of your fav pair of earrings!
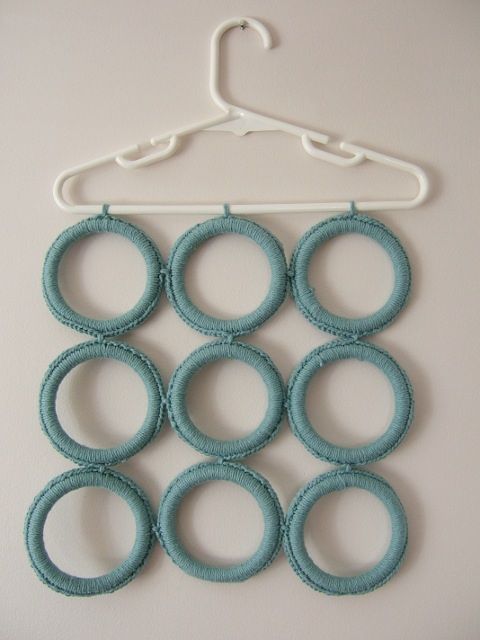
3. Hanger + shower curtain loops = tangle-free scarfs
 This here has been a complete life saver for me.
I tried every method possible to keep my vast collection of scarfs (perks of being a Hijabi) organized, and from getting rolled up into drawers. But none of the methods worked as best as this super easy, DIY organization idea did! If you too are sick of the mess these scarfs create, you will jump at the idea of this DIY organizer.
Here’s what you will need:
*The number of loops you will need is dependent upon the number of carves you have.
HOW?
-
- Fasten each loop together with a piece of thread, forming a pyramid-like shape.
-
- Next, fasten the tied pyramid of loops to the hanger, again with the help of a thread.
-
- Now to keep the thread in place for a long period of time, apply cloth adhesive over it and let it dry.
That’s about it! Your DIY scarf organizer is ready to be put to use. You will thank me when you, no more have to take care of a huge ball of tangled scarf, stuffed somewhere in your closet! check out.
P.S. if crocheting is something you love doing, here’s how you could personalize your scarf organizer:
4. Revamp the closet space:
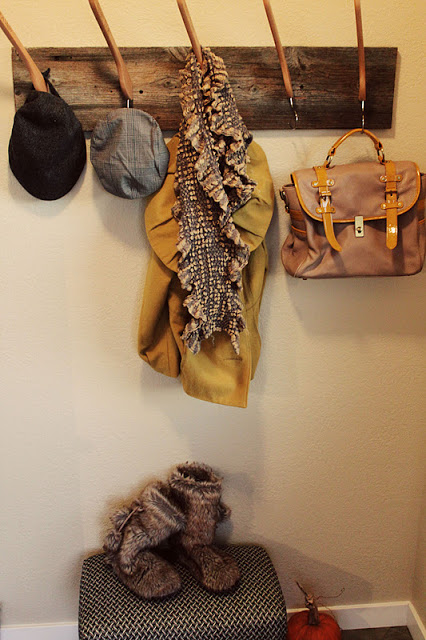
Closet spaces are essential when it comes to keeping your home tidy as well as organized.
Trust me, these tiny spaces can do more than wonders! But all they need is a bit of revamping. And here’s one brilliant DIY organization idea that does exactly so.
This is what you will need:
-
- – A wooden plank
-
- – Wooden coat hangers
-
- – Drill machine
-
- – Wood cutter
-
- – Wood glue
-
- – Nails/screws
HOW?
Cut one side of each wooden hanger with a hacksaw and with the help of a strong wooden glue, attach them to the wooden plank on measured spaces.
Next, drill holes into the plank and attach it to whichever wall you have chosen, with either nails or screws.
That’s about it.
*Where you once had a plain wall now stands a multi-purpose hanging, where you can hang a coat, a bag, and a hat, all together!
P.S. To make it all the more hassle free, you can also take the wooden plank and hangers to a wood workshop, to get it cut and drilled.
5. Crafty-goodness organizer:
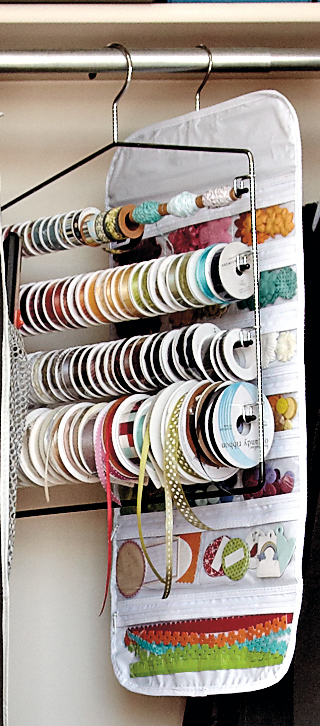
If crafting has been your passion since childhood, taking care of all the craft material would have been so messy!
But this idea right here has changed everything – mostly the cluttered box of crafty-goodness that lay under my study table, where in place now hangs a hanger full of craftiness.
Now there are two types of organizers that you could make:
-
- – Using a pant hanger, perfect for ribbons
-
- – Using a simple wire hanger, perfect for tapes.
HOW?
Apart from the pant hanger, you will require the clutter of ribbons lying in the box and some organizational and color coding skills.
*Grab the pant hanger and swipe in all the ribbon wheels and thread rolls into a mess free, easy to use crafts hanger!
Tape hanger:
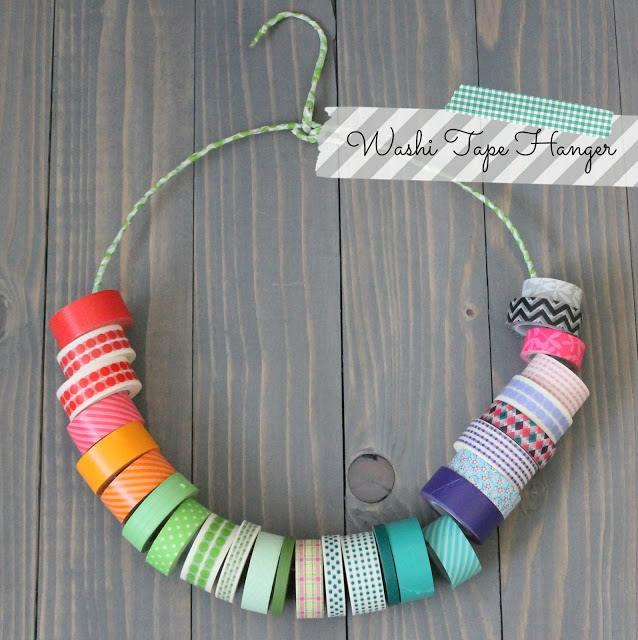
For this, you will additionally require pliers and all the tapes lying around in the drawer.
HOW?
With the help of a plier, bend the usual shape of the hanger into a round ring. Slide the tape rolls in and done!
*For an even craftier look, wrap the wire hanger with either ribbons or tapes.